Getting Started
This guide gets you from installer downloaded to panels on your phone in about five minutes. It assumes you'll run GlassOut on the same PC as MSFS (host mode), which is the default and what most users want.
If you'd rather run the desktop app on a separate display PC while the engine stays on the MSFS PC, finish this guide on the MSFS PC first, then read Host or client? for the split-PC walkthrough.
1. Install GlassOut
- Download the latest installer from glassout.flyingart.dev.
- Run
GlassOut-Setup.exe. Windows SmartScreen may prompt you — click "More info → Run anyway". - Launch GlassOut. On first start you'll be prompted for Administrator privileges (Windows UAC) — GlassOut needs elevated access to read panels from the sim.
The app window is small and dark on purpose — it's meant to be portable and handy.
2. Start a flight
Fire up Microsoft Flight Simulator 2024 or 2020 and begin a flight. GlassOut will:
- Detect the simulator.
- Attach to MSFS once you enter the cockpit — no pop-outs required.
- Discover instrument panels and list them on the Discover tab.
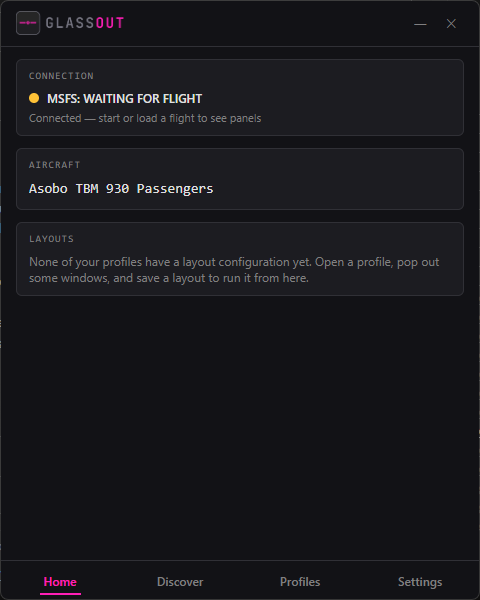
The connection indicator in the title bar turns green when everything is live.
GlassOut only supports DirectX 12 — it's the only graphics API that exposes panels in the way GlassOut needs. If you see a DX11 warning, switch MSFS to DX12 in Options → Graphics → Graphics API and restart the sim.
3. View your first panel
- On the Discover tab, click any panel and hit Open. A borderless window pops open with a live pixel-perfect stream.
- Or copy the URL — that's a plain web page (e.g.
http://192.168.1.42:8787/panel/PFD_Captain). Paste it into any browser on the same network.

4. Connect from your phone or tablet
- Install GlassOut from the App Store (iOS) or the Play Store (Android).
- Make sure your phone and PC are on the same Wi-Fi network — prefer a 5 GHz SSID over 2.4 GHz, keep the device in good signal range of the router, and avoid crowded channels. Streaming is sensitive to WiFi throughput; see the mobile app guide for details.
- Open the app — it auto-discovers the engine. Tap the
GlassOut Engineentry. - If mDNS doesn't work (guest Wi-Fi, client isolation, corporate networks),
tap Enter manually and type your PC's LAN IP and port
8787.


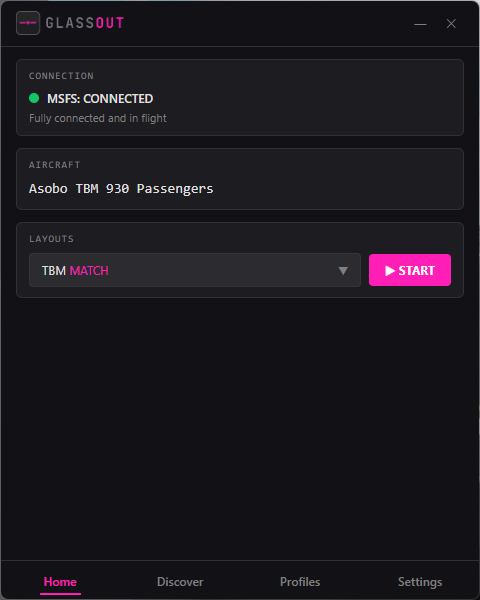
5. Make a profile
Profiles are the reusable unit in GlassOut. One profile = one aircraft = one set of fragments, templates, and saved window positions.
- Go to the Profiles tab → + New.
- Give it a name and an aircraft regex (e.g.
Fenix A320or.*G3000.*). - Use the Discover sub-tab to crop fragments out of panels, or compose a Template canvas if you want multiple gauges on one screen.
- Open the windows you want where you want them, and hit Save Layout.
Next time you select that profile and press Start, every window reopens on the exact monitor and pixel coordinates you saved.
Read the Profiles, Fragments, Templates and Run & Layouts guides for the full story.
6. Unlock the full version
Without a license, panel frames carry a repeating DEMO watermark — visible on every device, including the mobile app and any remote browser.
Grab a license from your purchase email, open Settings → License, paste the key, and click Activate. The watermark disappears on every connected viewer within a second.

See the Licensing page for details on device transfers, offline validation, and demo behavior.